
How to Create a Stars and Planets Time Lapse in Photoshop
- Dec 19, 2012
- 3 min read
Create this loopable time-lapse animation from scratch all inside Photoshop! This tutorial will show you how to create an animated night silhouette scene with a surreal space background full of stars, galaxies, and planets.
Learn how to create a time lapse scene in Photoshop. This tutorial will teach you how to create, animate and export a night scene full of stars, planets and galaxies using only Photoshop.
Preview of Final Results
Tutorial Resources
Galaxies Brushes – sunira
Galaxies Brushes 2 – chuloc
Planet Brushes – sunira
Tree Brushes – horhew
Fractal – greenaleydis-stock
Step 1: Create a new document
Create a new file in Photoshop (Shortcut: Ctrl/Cmd+N) using these settings:
Width: 1600px
Height: 475px
Resolution: 300px/inch

Step 2: Install the brushes
In this step we’re going to install the four brushes we’re going to use in this tutorial. Download all of them and extract them to your Adobe/Adobe Photoshop(…)/Presets/Brushes folder.

Now go back to Photoshop, select the Brush Tool (Shortcut: B) and right click anywhere in the canvas. Then click in the little arrow at the top of the brush menu (see image below).

Then click in Load Brushes, go to the folder where you extracted them and select “Trees_by_Horhew”.

The tree brushes will now be on the bottom of your brushes panel (Right click anywhere in the screen to see them).
Step 3: Draw the landscape
Go to View > New Guide and set the new guide position to 445px and the orientation to Horizontal.


If you don’t see the guide we just created, press Ctrl/Cmd+; to show your guides (or go to View > Show > Guides).
Select the Rectangular Marquee Tool (Shortcut: M) and make a selection of the bottom part of our image (start the selection in the bottom of the image and finish it in the guide we created).


Now press D to return the colors of your palette to black and white, and then hit Alt/Opt+Delete to fill your selection with black.
You can press Ctrl/Cmd+D to deselect your selection
You can press Ctrl+; to hide all the guides of your project

Before we start adding the trees, let’s make a new layer to hold them. Press Ctrl/Cmd+Shift+Alt/Opt+N to create a new layer and name this layer ‘Trees’. Since we’re renaming layers, change the name of our first layer to ‘Border’.

Now we’re going to start making the landscape of our animation. Press B to select the Brush Tool, and here’s how we’ll do it:
Make sure that black is still your foreground color
Make sure that your brush is set to 100% Opacity
You can quickly decrease or increase the size of the brush hitting ‘[‘ or ‘]’ respectively
To make the grass select some high trees and paint with their top part slightly above our black rectangle
Add 5 or 6 big trees in our project
Add some bushes near the trees and at other random places (you can also use them to make grass if you decrease their size)
Try to make some parts of the terrain higher than others
And here’s how I made my landscape, step-by-step.

Your image doesn’t have to be exactly like mine, use your imagination and try to create a unique landscape!
Step 4: Add the Stars
Now let’s add the sky. Open the fractal stock, hit Ctrl/Cmd+A to select all of it, and then copy (Ctrl/Cmd+C) and paste (Ctrl/Cmd+V) it into our project.

Your image should look like this now. Make sure the sky layer is above all the others

Press Ctrl/Cmd+T to use the Free Transform Tool and change the Width and Height values in the top toolbar. Set them to 77%.

Place the image in the right place again (click and drag), and you should have something like this now:

After resizing the stars a little bit, move them like shown in the image below (just click and drag to move).

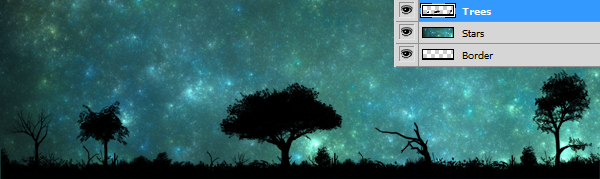
Now change the name of this layer to Stars and place it below the Trees layer. Click and drag the layers to move them around


Comments